Hike Number 14 & 15, May 1-2, Zion National Park

Note: This weekend’s hike was a little bit different, as we decided to venture a little further than Malibu or the Palisades and into Utah for a weekend getaway in the mountains of Zion.

Abby: On Thursday morning, Sasha picked me up to begin our journey to Zion. After stopping in Larchmont for the best coffee I’ve ever had, we met two friends, packed up the SUV and made our way inland with plans to stop in Las Vegas for lunch. Prior to this weekend, I’d not made the drive to Las Vegas, so I was quite fascinated along the way. Five hours later, we were there. As an east coaster, this felt very reminiscent to when the train goes above ground as you arrive in New York. After a quick lunch at Shake Shack, and a (wasted) $100 bet on the Mayweather Pacquaio fight, we took off on the final leg of the drive.

z1

The road to Zion (is that a book?) took us from Las Vegas to Arizona and finally to Utah.

Sasha: After a few more delays to pick up a ton of food and booze we didn’t eat or drink, we arrived in Virgin, Utah (true) just as the sun was setting. From Virgin, we had another 30 minute drive to the house, which we knew from pictures was fairly remote. As we drove up the earie and secluded road to the house, we were grateful our friends, who had arrived before us, had dropped us a pin via text to point us to our destination. When we finally arrived, we were thrilled to be greeted by our friends’ craft cocktails, a telescope pointed at a clear sky and waxing gibbous moon, and a fire pit waiting to be lit. After a casual dinner of wine and cheese, and a lot of songs around the fire, we headed to bed, excited to wake up to our first views of Zion.

z2

The next morning, we woke up early and we were not disappointed. From our patio, we had a view of the incredible red and white sandstone cliffs of Zion against the bluest sky I had ever seen. We spent a few hours exploring the house, trying to find cell phone service and making our plans for the day. After we finished our breakfast (and most importantly, our coffee), we each packed ourselves a sandwich and got ready to hit the road.

z5 z4 z3

We had decided to spend our first day exploring The Narrows, the (appropriately) narrowest section of Zion Canyon. We didn’t know much about the hike, except that we would be hiking through and along some water and would need to rent appropriate footwear, so we headed into Springdale to the Zion Adventure Company. After watching a short video, we realized that we would really be hiking upstream through Virgin River, which would (at points) reach our waist. I quickly realized that my Lululemon pants would not keep my cell phone safe, so in addition to the canyoneering shoes, neoprene socks and walking stick that came in our rental package, I rented a waterproof sack and backpack.

After a short bus ride to the Temple of Sinawava, we walked 1 mile along the Riverside Walk to the gateway to the Narrows. After walking a mile on a hot day in neoprene socks, we were all eager to get our feet wet and we happily made our way into the river. We were immediately struck by the incredible views as we walked upstream in a valley between thousand foot high cliff walls. We depended heavily on our walking sticks, as the current was pretty strong and we couldn’t always see the rocks we were stepping on. A few times, I found myself slipping and ending up in water up to my waist, so I was happy I had packed a suitcase full of fast drying, moisture wicking clothes. Despite the cold water and warnings we could succumb to hyperthermia (I believe the water temperature was in the low 50s), the neoprene socks and hot day kept us warm. After a couple of hours, several hundred spectacular pictures and no electronic causalities, we found a sandy bank to sit down and enjoy our lunches. We realized it had taken us quite some time for our group of 9 to make it to our lunch spot, so we decided to turn around and head downstream and back to the Zion Adventure Company to return our equipment before they closed.

z6 z7

Our initial plan had been to have dinner in town to celebrate a friend’s birthday, but after our long day outside, we decided to instead take advantage of our patio’s Jacuzzi and grill. After dropping off our equipment, we stopped in town and picked up some steaks, veggies and sausages and headed back up to our incredible retreat. Since we had arrived late the night before, we were excited to see our first Zion sunset, so we spent the rest of the evening outside, grilling our dinner and enjoying the Jacuzzi, fire pit and a few bottles of wine.

Abby: I realize Sasha just said this, but that water hike was absolutely incredible, so I figured nothing could compare to that on Saturday. I was wrong. On Saturday, after a delicious breakfast, the daughter of the owner of the house we were staying at took us on a trail hike to a cliff overlooking miles upon miles of bright blue skies over quiet mountains. After a brief photo shoot, we made our way to a cave to scale. Climbing up, into the cave, and to the edge of the mountain made me feel a little nervous as it was steep, with loose rock and nothing to hold onto. A fall could have really hurt. Fortunately no one was injured, and we were able to enjoy a quick snack break on top of the cliff before heading back down and to the house. That afternoon, we took in more views, snacked, and watched the Clips winning before making our way outside to see the stunning sunset. I wish these photos did it justice. It’s something I’ll never forget.

z8

z9

z11

z12z10

z14

When the sun had set, we watched the fight and enjoyed the rest of our time together in the house.

z13

Sasha: After a long Friday and Saturday, once the sun set and we caught our last evening views of Zion, we had a light dinner of leftovers and spent the rest of the evening enjoying each other’s company and losing money on the Mayweather-Pacquiao fight. I headed to bed early, sad knowing we would have to wake up and leave our incredible vacation the next morning. When we woke up the next day, we quickly packed our things and hit the road by 9:30, eager to beat the fight traffic we anticipated catching up with in Vegas. As we left the house, the owner came by to see us off, and as he took our last group picture, he said “The home will miss your energy when you leave.” By some magic (maybe Zion’s), we managed to make it home in record time, and spent the rest of our afternoons texting each other our favorite pictures and swearing to go back as soon as we could.

Hike Number 14, Sunday May 3, Hollywood Stairs Circuit

Distance: 2 miles

Elevation Change: 266 ft

Temperature Day of Hike: 80 degrees

Directions: From Franklin Avenue, head north on Beachwood Drive. Once you pass the Beachwood Café (Beachwood and Westshire) park anywhere.

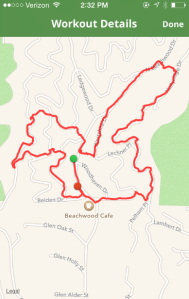
Abby: On Saturday, Sasha sent me a text with a link to the Hollywood Stairs Circuit and asked if I was up for it on Sunday. We’d been talking about trying an “urban hike” for a while, so despite my feelings for running stairs, I agreed. When we parked at Beachwood Canyon, we weren’t sure of cell phone service, so we sat for a bit to take screen grabs of the route.

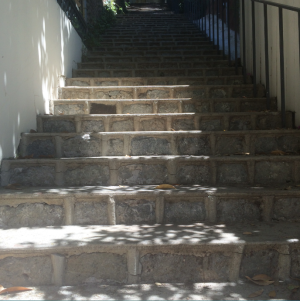
While Sasha did this, I googled how many stairs and it was in the 800’s. From the car, the trek to the first set is a small climb up Beachwood Canyon Drive. When you reach the stair case, you meet a set to haul up. Per my Google search, this was 124 steps. At the top, you are greeted by signage directing you to the right for the second set.

1

As you continue up the canyon to the second set, take advantage of the incredible views of the Hollywood Sign and Downtown LA.

2

The second staircase was a bit hidden, but since we knew the address markers, we were able to spot it, and make our way down. At the top of the second set, we were welcomed by more beautiful views of Downtown LA and now the Griffith Observatory.  Once we reached the bottom, we continued on to the third set.

b2

Sasha: When we started the blog, we really set out to find and explore hikes in the LA area that didn’t require too long a drive, but were still challenging. The past month has been pretty hectic for both of us, so we were excited to take the opportunity to find a local “hike” that would take us to a neighborhood we weren’t too familiar with. The idea of the urban hike really appealed to us too – we were hoping to use some of our hikes as excuses to explore urban Los Angeles.

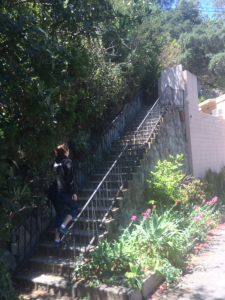
The third staircase was probably one of my favorites – it is a divided set that apparently was once home to a water feature that has been converted to planters. We descended 138 steps, and found our way back to Beachwood Drive, where we found staircase number four.

3

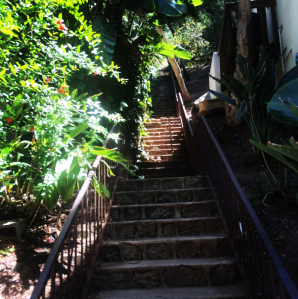
The fourth staircase was hidden between houses on Beachwood Drive, and at 144 steps, was the first of the more challenging ascents. This staircase was a little overgrown and steep, so we definitely were grateful for the just in case handrail. Both Abby and I have been known to take a tumble on a hike, so we were fairly cautious on the steep, narrow stairs. Once we got to the top of set four, we were treated to more spectacular views of the city. From the top, we headed back to Beachwood Drive, to find the largest ascent, staircase five.

5

Abby: At 176 steps, the fifth set was the most challenging, in my opinion, so I was eager to see what was next on flight six. It was a nice descent back to Beachwood Drive, although as Sasha said, the steps were super narrow, so I took them a little slowly to avoid an “Abby fell down the stairs on a hike” story.

Sasha:

The blow by blow directions:

From the intersection of Belden Drive and Woodshire Drive:

  1. Head north on Woodshire Drive to staircase 1, on the left just before 2795 Woodshire Drive and ascend 124 steps.
  2. At the top (Belden Drive) head left.
  3. At the fork in the road, bear right (Flagmoor Place) and at the intersection at Durand, continue uphill on Durand.
  4. Staircase 2 is located past 2954 Durand; descend 117 steps.
  5. At the bottom of set 2, you will be back on Belden Drive. Continue on Belden, cross Rogerton, and find staircase 3 just before 2950 Belden Drive. Descend 138 steps.
  6. Once you reach the bottom, cross Beachwood Drive and head to the right.
  7. Staircase 4 is located after 2800 Beachwood Drive; ascend 144 steps.
  8. At the top of set 4, turn left and head downhill on Westshire. Once you reach Beachwood, continue on, crossing Belden to staircase 5.
  9. Find staircase 5 after 3020 Beachwood Drive. Ascend 176 steps to the top.
  10. At the top of set 5, turn right onto Hollyridge Drive. Continue on Hollyridge past Pelham, and find staircase 6 just past 2831 Hollyridge Drive. Descend 149 steps.
  11. You’re done! Take a break at the Beachwood Café, or reverse the series for a more challenging hike.

Pro’s:

– Amazing views

– Quick and challenging

– Not too crowded

– Easy for us to get to

Con’s:

-Stairs were a little narrow

– May need to do it a few times to really feel a burn

Holy shit view factor: 6/10. The views aren’t totally unique to the hike, but always beautiful

How good your ass will look after: 8/10. Climbing stairs is no joke.

Post hike grub spot: Beachwood Cafe. We decided to stop there because it was close, and because we saw Secret Service hanging out outside. We were hopeful to see Hillary, but were unsuccessful in that endeavor.

1 2 3

Hike Number 12. March 29, 2015. Tuna Canyon.

Distance: 3.67 miles (Likely closer to 3.8 miles – we accidentally turned off tracking for a bit on MapMyHike)

Elevation Change: 728 feet

Temperature day of hike: 78 degrees

Directions: From PCH in Santa Monica, head north until you reach Big Rock Drive. Turn right onto Big Rock Drive, and follow it 1.7 miles to the top until it dead ends. There is limited parking at the top of the hill.

Abby: Sasha and I had a much more eventful weekend than usual, with a late night comedy show on Friday, and a full day of making pasta from scratch (and drinking a lot of wine) on Saturday. By the time Sunday rolled around, we were exhausted and a little cranky. I’m writing this as a caveat to what may be a slightly bitter review.

Around noon, we finally made our way to Starbucks before heading to Malibu. When we got to the mountain, we made our way up a super windy road overlooking the Pacific Ocean. It was really beautiful but also quite sharp, so drive slowly. As we hit a curve nearing the top of the hill, we saw a creepy animal, which Sasha recognized as a coyote. I didn’t know I was afraid of coyotes until this point. So now, on top of being cranky, tired and maybe a touch hungover, I am also anxious and without cellphone service. Not my best combination.

When we got to the top, it was a total dead end, so we weren’t certain where to park. We noticed that there were a couple of cars on a pseudo sidewalk, and with a small car, we were able to squeeze in. Not sure if this is legal, but we figured a tow truck wasn’t going to make its way up that windy hill, so we risked it.

After a few minutes of complaining, we made our way to the gated entrance to the service road to begin our hike.

4

Sasha: After we awkwardly climbed over the locked gate, we started on the paved road up to the top of the mountain. As Abby mentioned, we were both feeling under the weather, so neither of us was thrilled when we realized we had quite a climb ahead of us. Since we didn’t have cell service, we weren’t really sure what path to follow, so we headed straight up Big Rock Drive. If you’ve ever met either one of us, you’re probably aware that we can be quite verbose, so it was pretty telling that we said maybe 5 words to each other over that first 2/3 of a mile.

1

Abby: When we finally made it to the end of that miserable hill, we were shown two options. One was to head down a hill (Big Rock Lateral), the other was to keep climbing up Big Rock Drive. We decided to keep climbing up, so that the end of our hike was downhill rather than uphill. As we trekked up, we noticed two different spots where someone had buried an animal and now I’ve not only seen a coyote, and climbed straight up a concrete hill, I’ve also seen memorials to dead animals on the side of a mountain. Sasha put it into perspective by saying this was reminiscent of “Pet Sematary.” I am officially no longer interested in this hike.

3f

Sasha: Once we saw that second shrine, I turned to Abby and said “Let’s just find a good point to turn around and end this thing.” We knew there was a meditation maze somewhere on the hike, and were hoping to get to it but weren’t sure how to find it. After a little more walking, I noticed a meditation maze to our right, through some heavy bushes. We continued on, hoping to find an easy path to the maze. We finally found a small opening in the brush and tried to head towards the maze, but quickly realized we had no idea where we were going and turned around, pushing past overgrown plants to make it back to the main trail.

2

At that point, we decided we had spent more than enough time on the trail. We were pretty spooked after the animal shrines and the feeling of total isolation on the trail, so we picked up our pace on the way back to the car. As we reached a flat section bordered dry rocky ground and low plants, we heard the unmistakable sound of rattles surrounding us. I paused to listen, and Abby said “don’t even say anything,” so we booked it until we were clear of the sound.

Abby: When I learn that there are rattlesnakes in addition to all of the aforementioned, I just start laughing as this whole thing has become a big joke. We picked up the pace, and quickly made our way back down the hill. I’m fairly certain I’m going to fall down the concrete hill as icing on the cake, but somehow I don’t.

d

q

Pro’s:

  • Great views
  • Wide trails
  • Easy to find your way back down

Con’s:

  • The concrete climb at the beginning is incredibly steep
  • There is no shade
  • All of the deadly animals and burial sites

Holy shit view factor: 7/10 If it would have been a clearer day, the views would have been significantly better, so there is potential.

How good your ass will look afterwards: 7/10 That first .6 miles will bring your ass up at least an inch.

Post hike grub spot: Since we were at the tip of Malibu, we drove back to San Vicente and stopped at À Vôtre Santé because Gwyneth Paltrow like their food. Their mimosas were only $4 and the food was delicious.

a b c

Hike Number 11, March 23, 2015. San Vicente Mountains.

Distance: 5.34 miles round trip

Elevation Change: 784 feet

Temperature day of hike: 70 degrees

Directions: From Sunset Boulevard, turn North onto Mandeville Canyon Road. After 4.8 miles, turn left onto Garden Lane Road. Parking is easy, and free, and the trailhead is easily found at the base of Garden Lane Road.

Abby: When we woke up on Sunday morning, it was pretty hazy outside, which was welcomed after last weeks 90-degree hike, so we decided to stay inland since clouds would likely obstruct the ocean views. We also needed to ensure we found a trail that was dog friendly, as Sasha’s mom and family dog Buster joined us this week. The San Vicente Mountain offered a trail that was perfect for this day and our guests.


Sasha: After cramming my mom, Buster and Abby into my tiny Fiat, we headed west to Mandeville Canyon to begin our hike. Mandeville Canyon is a beautiful and secluded neighborhood in Brentwood that extends deep into the Santa Monica mountains, and its winding roads are popular with mountain bikers and horseback riders. We drovealmost 5 miles up the winding canyon road, avoiding hitting several aggressive mountain bikers braving the single lane road, and found easy street parking on Garden Lane Road. The trailhead should be fairly east to spot as soon as you make the left turn onto Garden Lane Road, but per usual, I was only half paying attention so I ended up at a dead end before tracking back to find the trailhead.

To start the hike, we passed through a gate marked Santa Monica Mountains Conservency Zone Parkland, and began up the Water and Pole Power Road towards the Mandeville Fire Road. After about half a mile, we came to the first intersection, where we stopped to check our directions. We turned right, continuing up the Water and Pole Power Road and quickly gained the majority of the hike’s elevation until we reached the second intersection, the W. Mandeville FireRoad. We checked our directions again and turned right, almost immediately noticing a sign pointing us towards San Vincente Peak, .5 miles away.

Abby: When we made it to this fork, we were surprised at how high up we’d already climbed. The incline was steep, but steady, which I much prefer. As we made the right and continued up, we were surprised at how quiet the trail was. I think we’d only seen three other people at this point. We persisted up the trail, taking in the lush views and a quick steep incline to make our way to the Nike Missile. There were several picnic tables, a bathroom, drinking water fountains to refill if need be and even a payphone in case you wanted to call your parents


After checking out the views from the top of the tower, we headed toward Mulholland Drive to make our way back down, closing the loop.  

Sasha: After turning right on the unpaved section of Mulholland Drive, we walked until we passed through a yellow gate (usually closed to car traffic) and past a small parking lot before noticing a second yellow gate to the right. We entered the gate and joined theCanyonback Ridge trail, an easy fire road of rolling hills covered with beautiful wildflowers. After about 20 minutes of walking, I pulled up MapMyHike, as the directions mentioned that the intersection with the Hollyhock Trail was easy to miss. I was happy to see that it was marked on the app, so we continued walking confidently until we found it, and turned right to complete the loop. Once we were on the Hollyhock Trail, we knew we were home free, and descended back towards Mandeville Canyon Road. At the bottom of the trail, we walked through a pretty wooded area and past a few beautiful homes before the trail dumped onto Mandeville Canyon Road. We turned right on Mandeville, where I almost ran back up to the car (parked on Garden Lane), to complete the loop before my phone died.


   Pro’s:

  • Mountainous views
  • Not very busy
  • Lush greenery and beautiful, bright flowers
  • Plenty of photo opportunities

Con’s

  • It was a pretty steady climb, not much of a challenge
  • Not much signage, we had to rely on our MapMyHike app often

Tips:

  • Have directions with you, as it’s not clearly marked
  • Even on hazy days, wear sunscreen. There isn’t a lot of shade

Holy Shit View Factor: 4/10. The greenery and lush flowers are beautiful, but you’re mostly looking at the Valley.

How Good Your Ass Will Look Afterwards: 4/10 It was a climb, but being that it was slow and steady, it wasn’t much of a workout.

Post hike grub spot: We drove back to Beverly Hills for a quick snack at Oliverio at the Avalon Hotel. We were seated right away in a cabana by the pool, and had a yogurt parfait and a kale Caesar salad. They also offered $15 bottomless mimosas until 4pm. It wasn’t too busy, so the service was great.  

Tracking the hike: We used MapMyHike to track, but also relied on tips from Hikespeak.


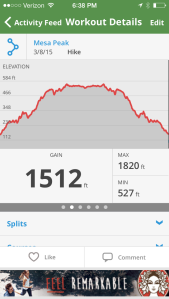
Hike Number Nine, March 8, 2015: Mesa Peak.

Distance: 6.65 miles round trip

Elevation Change: 1,512 feet

Temperature day of hike: 75 degrees

Directions: From PCH in Malibu, drive inland on Malibu Canyon Road for 4.5 miles and turn left into the parking area for the Piuma Trailhead on the west side of the road. From the north, take the 101 Freeway to exit 32 for Las Virgenes Canyon Road in Agoura Hills. Drive south for 5 miles on Las Virgenes Canyon Road (which becomes Malibu Canyon Road) and turn right into the parking area for Malibu Creek State Park’s Piuma Trailhead. The turnout is 0.1 miles south of Piuma Road and 1.6 miles south of the main entrance for Malibu Creek State Park.

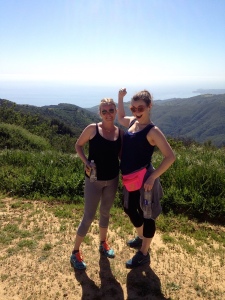
Abby: Leading up to this weeks’ climb, we had both read and been told that the Mesa Peak hike in Malibu State Park was notoriously challenging, which we were initially excited about. The day started a little later than planned, maybe due to Daylight Savings Time, maybe due to a hangover, but most likely due to beach traffic. When Los Angeles weather goes from “cold” to mid-seventies in five days, the beaches fill up quickly.

We took PCH up to Malibu, turned right onto Malibu Canyon Drive, and after about four and a half winding miles through the tall, plunging mountains, we began to feel a little nervous about what we were about to encounter. And rightfully so.

ed

Sasha: We found easy parking at the Piuma Trail parking lot, where you can park for $10 per vehicle (check local signage for instructions). After we parked, we walked past a porta-potty and out-of-order bathroom to the well-marked base of the Backbone Trail. We immediately started a steep climb up a rocky single-track trail. After about ½ a mile, the trail evened out and at 2/3 of a mile, the Backbone Trail ended at the Mesa Peak Service Road, where we turned left to continue up the hill. While this first 2/3 of a mile has nice shaded coverage, once you hit the service road the trail is largely uncovered so be sure to lather on the sunscreen before you head out.

b

Once we turned onto the service road and rounded a hairpin turn we realized that we had quite a bit of climbing left to do. We continued onward, stopping several times to catch our breath, hydrate and admire the sweeping views of the surrounding mountains and Malibu Canyon. We noted some landmarks (Brents Mountain, which we named Boob Mountain, was a favorite) and measured our progress by our relative position to the sights. After one particularly grueling climb, we stopped to catch our breath and noticed Malibu Canyon Road in the canyon far below us and I made the classic mistake of checking our progress on MapMyHike. We had only climbed 1.5 miles and had about 2 miles left to Mesa Peak.

52

Abby: When Sasha announced we still had about two miles to scale, I was shocked. I felt as though we’d been climbing up that steep mountain for hours. At this point, we looked at each other and exchanged “I can’t believe we haven’t thrown up” admissions. However, if there is one trait we share, it is our tenacity, so we were going to make it to the top however challenging it may be. We continued upward and onward for another two miles until we made it to Mesa Peak. The views from this point made all of the leg and ass pain worth it.

3

Sasha: The highest point of the climb actually happens before Mesa Peak, where a fork in the road greeted us. We veered left, toward our destination. Before we made the descent, we stopped at the top to take some pictures of our first major coastal view, and noticed some rock piles marking the location. After a few minutes, we continued onward to Mesa Peak, which we could tell would give us even better and less obstructed views of the coast below us. As we approached, we noticed a narrow path to the right up to the summit, and scrambled up to the solar panel and small building at the top. Once we reached the top, we realized there was another lower peak obstructing our view, so we bushwhacked our way across a poorly maintained footpath to our reward: panoramic views of the Pacific below us.

2 02 1 01 0

Abby: After taking in the views and cooling off for a bit while staring at the ocean, we decided to head back down the mountain. I’ve said this many times, but I am always trepid on the way down. This trail was no different, especially as it was such a steep climb up, and the trail was so loose. While it was a significant challenge on the way down, I have to admit that I basked in pride as we made this trek downward because seeing how vertical the trail was shocked me. I cannot believe we made our way all the way up that mountain.

Sasha: As Abby said, the trip down the mountain was pretty harrowing. Despite my well-treaded trail running shoes, I had a complete wipeout on one of the steeper sections of the descent. For the first time, hiking sticks seemed like less of a joke than a necessity, and we envied those we saw using them flying down the mountain. We’re still not entirely convinced we need them, but we’ll see how we feel after our next 1500 foot climb.

Pro’s:

  • Incredible views
  • A significant workout
  • No animals allowed, so no animal feces on trail
  • Wide open spaces
  • Not very busy
  • Peaceful, despite the challenge

Con’s:

  • Very few resting spots
  • Not a ton of shade
  • Watch out for snakes – we encountered our first one on this trail!

Tips:

  • Don’t forget a camera
  • Be prepared for steep climbs
  • Bring extra water and wear sunscreen

Holy Shit View Factor: 10/10

How Good Your Ass Will Look Afterwards: 9/10 This is a very steep climb

Post hike grub spot: As we’ve mentioned, Malibu has some exceptional venues for post-hike grub. We decided to stop at Duke’s on the way back east and although we were told there would be an hour wait, we found a nice spot at the bar, right on the ocean. We ordered Pina Coladas and they were incredible. After sucking the first one down quickly, we ordered wings and Brussel sprouts proving that we both have a little east and west coast in our blood. The food was great, service was wonderful and we paid less for our meal and drinks than we usually do for a bottle of wine. Highly recommend.

Tracking the hike: We used MapMyHike to track, but also relied on tips from Hikespeak (linked above).

x1 x2 x3

Hike Number Eight, March 1, 2015: Zuma Canyon Trail.

Distance: 4.01 miles round trip

Elevation Change: 755 feet

Temperature day of hike: 65 degrees

Directions: From PCH headed north, turn right on Bonsall Drive. Continue until it ends at a short dirt road to a parking lot. For GPS, use 5875 Bonsall Drive, Malibu, CA 90265.

Sasha: When Abby and I started brainstorming this week’s hike, we decided we wanted to try something a little longer and steeper, and preferably with some killer ocean views. I had hiked the Mugu Peak Trail before, and we thought we would roll the dice on rainy forecasts and take a farther drive up PCH for that climb. When we headed out on Sunday morning, we realized PCH was closed at Point Mugu because Los Angeles and rain, so we did some fast research en route and thought Zuma Canyon would be a nice replacement. Zuma is well-known for its gorgeous Malibu beaches, so we were confident we would be in for some spectacular views. And we were right!

Once we found parking in the almost-empty lot, we saw the trailhead at the northwest corner, near a box full of maps, and started the walk to the trail. We were planning on making a loop of two trails: the Ocean View Trail and the Canyon View Trail. After we walked for about ¼ of a mile, we hit a sign that said Canyon View Trail, but we decided we were more interested in starting with the Ocean View Trail, so we continued on. After a few minutes, we ran into a second intersection and a sign that said Ocean View Trail by a path to the right and headed that way.

  14 15 1612

The initial climb was mild; we noted the beautiful flowers that lined the sandy, narrow, single track tail as well as the giant mines made of horse poop we were constantly hopping around. After a few switchbacks, we got our first glimpse of the Pacific from the trail and the climb became aggressively steep. We stopped several times to catch our breath and to admire (and take pictures of) the gorgeous views of the ocean. We also noticed the angry storm clouds to the north, but were grateful for the cool breeze that seemed to be coming from their direction. Once we got to the top, we wandered down the well-marked Kanan-Edison Road for a bit to check out the views, but quickly turned back in the direction of the Canyon View Trail to complete the loop back down the mountain.

13 12 11 10 9 8 7 6  4 3

Abby: As Sasha mentioned, the views on this trail were absolutely phenomenal and to get to them literally took my breath away. Those hills were no joke, and despite the fact that we work out every day, I was out of breath with burning calves by the time we got to the top. Actually, to be honest, I was out of breath many times on the way to the top. Some of the hikes that we’ve been on to date have been rather easy to climb; Zuma Canyon was definitely not that, so you do get a workout.

The trail was a loop, which was nice, as it gave us even more opportunities to take in the ocean, greenery and hills from another angle. However, the way down was also quite steep, and since the trail was so narrow, it’s a little intimidating to be so high up with such steep falls. Sasha was patient with me as I was a tad trepid, since, you know, I’d like to make it to thirty-one

.5

The cool breeze was a nice addition to the trek down, since that climb had us sweating pretty profusely. I’d recommend going on a day that isn’t too hot. Overall it was beautiful, just be prepared for a tough climb to the top.

Pro’s:

  • Incredible views
  • A great workout that doesn’t take too long to complete
  • Healthy greenery that is well kept

Con’s:

  • Very little shade
  • Narrow trails
  • Tons of horse poop

Tips:

  • Don’t forget a camera
  • Be prepared for steep climbs
  • Bring water and wear sunscreen

Holy Shit View Factor: 10/10

How Good Your Ass Will Look Afterwards: 9/10 This is a very steep climb

Post hike grub spot: One of our favorite things about Malibu is how many options there are for a great meal and cocktail. We have been talking about getting Pina Coladas for a long time, so we stopped at one of our favorite spots on the way back down PCH, Moonshadows. The bar to sit over the ocean was closed, but we still had a beautiful view sitting inside and shared some calamari and ahi tuna over our Pina Coladas

Tracking the hike: MapMyHike was really helpful this week as we weren’t totally sure if the trail was a loop or not.

a b c

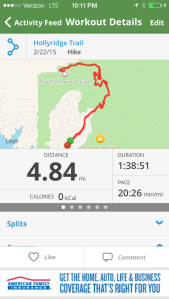
Hike Number Seven, February 22, 2015: Hollyridge Trail to the Hollywood Sign

Distance: 4.84 miles round trip

Elevation Change: 853 feet

Temperature day of hike: 60 degrees

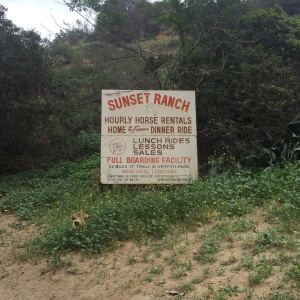
Directions: From Franklin Avenue, head north on Beachwood Drive. Beachwood leads to a dead-end on Sunset Ranch, which is where this hike begins. There is plenty of parking on Beachwood, just pay close attention to the parking signs to make sure you’re safe to leave your car. We parked 2 stop signs south of the entrance to the ranch, about ½ mile from the trailhead.

Abby: Since it was Oscars Sunday, and I had guests from the east coast visiting, we decided to hike up behind the Hollywood Sign. It was pretty overcast in the morning, and we weren’t certain about what traffic would look like because of the awards show, but we were excited for the hike, the views, and the Instagram opportunities.

As we approached the trail entrance, we noticed that there were signs reading, “no Hollywood Sign access” but as we drove to the gate, a security guard let us know we could walk to the sign, just not drive to it. He also informed us that we had to park pretty far away, so be prepared for a small hike before the big hike. Also be certain to read the parking signs on the streets, because they were a bit confusing.

Sasha: Beachwood Canyon is one of my favorite places in Los Angeles – it’s lush, green, very private and the former home of the Hollywoodland community (and much Hollywood history.) I was really excited to share this beautiful place with Abby and our guests, so I was nervous that access to the sign would still be cut off. After talking to the security guard at Sunset Ranch, we drove back down Beachwood Drive, two stop signs from the entrance to the Sunset Ranch and found easy parking. Along the trek to the trailhead, there are plenty of beautiful homes to be distracted by (hello 1920’s Mediterranean Villas!) and not much sidewalk to walk on, so be weary of fast cars.

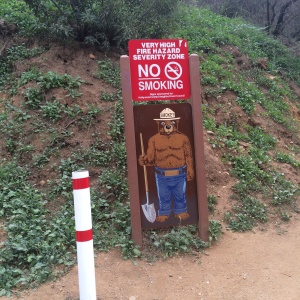
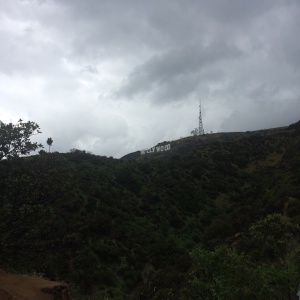
Once we made it to the gate, we continued up a short, steep hill until we reached the trailhead to the right. It’s pretty clearly marked, with a life-sized Smokey the Bear cutout admonishing visitors not to smoke, as fires start and spread easily in the dry mountain terrain. We hiked up a short bit, before hitting a T-junction (the Hollyridge Trail, where Smokey warns you one last time not to light up), and we veered left to continue up near the top of Mount Lee. We were almost immediately hit with a gorgeous view of the Hollywood sign, a perfect photo op for our out-of-towners.

h3 h4

We continued on, and caught a quick whiff (and view) of the horse stables below us to the left, which reminds me that we haven’t discussed the horse poop yet. There is a lot of it, so be prepared to jump over fresh piles every few steps. I’m actually pretty sure the “dirt” path is horse-made. After another quarter mile, we made a sharp left turn onto the Malibu Service Road (going right takes you deeper into Griffith Park) to continue up to Mount Lee. We got a few views of the Observatory and miles of Griffith trails to the east.

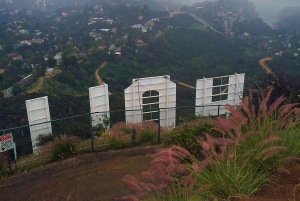
After another quarter mile, we turned right at Mount Lee Road, which begins the steep, paved climb to the top of the mountain. As we were admiring some interesting street art, it began to rain and I made my first promise to the group that we were almost at the top of the mountain. In reality, the last part of the climb is about a mile long, so as we all cried about the cold, (east coast guests included, who had escaped a blizzard to come to LA) as we continued to climb up the hill. About half way up the hill a local affiliate news trucks passed us and we were convinced someone had died from hiking in the rain. As we followed the news trucks, I made a few more promises that we were almost at the top, and we finally rounded the final bend where we saw the back of the “H” through the chain-linked fence that keeps hikers off the giant letters. Despite what you saw in “Friends with Benefits.”

h5h9h2

We continued onward, passed the “OLLYWOOD,” and saw the news trucks parked at end of Mount Lee Road, near the radio towers that top the mountain. It turned out the story they were telling wasn’t about a death from the rain, but rather, Oscars coverage from the Hollywood Sign. Because, we live in LA and saw many celebrities hiking that morning. (We didn’t, but we did stand in the cold rain, took many pictures and admired the views of the rain-soaked city below us.)

h0

Abby: Despite the freezing downpour, the views were unbelievable. There was something romantic about seeing the entire city under a hazy cloud. Not being from Los Angeles, I was also pretty mesmerized at the fact that we were standing behind the Hollywood Sign. After taking in the views, and shivering from the cold, we headed back down the trail. Because of the rain, it was pretty slippery so we treaded carefully. We were surprised a few times by some rocks that were falling from the top of the mountain, so we had to be extra careful, but I’m assuming that was also due to rain.

h1

When we made it to the entrance gate, we were reminded that we still had a ways to go to make it to the car. Once we reached the warm, dry vehicle, we agreed it was time for some hot food and fresh cocktails.

Pro’s:

  • Incredible views
  • Wide, well kept trails
  • Clearly marked

Con’s:

  • No shade
  • Beware of rocks falling
  • Tons of horse poop

Tips:

  • Don’t forget a camera

Holy Shit View Factor: 10/10

How Good Your Ass Will Look Afterwards: 8/10 This is a pretty steep climb

Post hike grub spot: We were all pretty hungry and ready for a cocktail after hiking in the rain, so we decided on Birds Café in Hollywood. Their menu is great; filled with options from kale salads to comfort foods like macaroni and cheese. They also had $3 mimosas! Definitely recommend trying this place.

h01

Tracking the hike: MapMyHike has been our go-to with these hikes, and it was reliable again this weekend.

h8 h7 h6

Hike Number Six, February 15, 2015: Inspiration Point, Will Rogers State Park.

Distance: 3.13 miles round trip

Elevation Change: 404 feet

Temperature day of hike: 75 degrees

DirectionsFrom Sunset Blvd in the Pacific Palisades, head north on Will Rogers State Park Road and park anywhere parking is allowed. I suggest parking on the street to get a little extra mileage on your hike, but there is parking at the park itself – just be prepared to pay $12.

Abby: The weather in LA has been incredible this week, so we were really looking forward to this hike. We had talked about heading deeper into the Palisades, but with the long holiday weekend, a touch of the flu and other commitments that evening, we opted for a hike that was closer to where we live and a bit shorter. We drove with the top down and parked the car outside of the park, to avoid paying for parking. When you get to the park, there is a large field that Sasha let me know was used for polo games. I’m here to tell you that we will be back to watch a polo game, because; hot men playing sports.

We had stopped at Starbucks along the way, so when we got to the park, we used the restroom which was clean and easy to find. Before you hit the trailhead, there are options to have a picnic, or play lawn games outside of Will Rogers’ former home. It is a beautiful location to spend time at, so I look forward to revisiting.

a9a2

Sasha: We wandered our way behind the ranger’s house and the ranch house (where I think tours are offered), and found a narrow stone path underneath some Eucalyptus trees. We followed that path for a bit, until it met up with what MapMyHike calls the Will Rogers Fire road, which also seems to be the Inspiration Point trail. There was a confusing sign posted that said “Inspiration Point .45 miles,” so we took that as a good sign and headed that way. Since the entire trip ended up being just over 3 miles, I’d guesstimate Inspiration Point was closer to 1.2 miles from that sign, but I’ve been known to be wrong.

a8

The fire road is wide well-maintained and easy to follow, with fantastic city and ocean views around every corner. It’s clear that a lot of money is spent on the upkeep of the park, which makes for an easy trip up and down the mountain. There are lots of trash and recycling cans along the way, and great west-LA people watching. There are a few well-placed, clean benches at optimal viewpoints, so if you get tired (or lazy) on the short climb up the mountain, you can take a seat and enjoy the scenery (by scenery, I definitely mean men in tight pants hitting balls on horses). Will Rogers Historic State Park is also home to the Westside Riding School, so be prepared to dodge horses and jump quite a few steaming piles on your way up.

a6

Abby: As Sasha mentioned, the views along the way were gorgeous. It was a hazy day, and we got to see the palm trees along the ocean as well as views of downtown LA. The people watching at the top of the mountain was also quite enjoyable with a man practicing Tai Chi. The way back down was pretty simple, but with the sunshine, the views and the company, it was so enjoyable. It was like a fancy Runyon Canyon. When we got to the bottom, people were still enjoying the space and it was quite busy, which feels nice in Los Angeles when you’re a little lonely.

a1

Sasha: Growing up in West-LA, I’d definitely spent quite a few Mother’s and Father’s Days picnicking at Will Rogers, so it was nice to revisit a familiar spot. Now that I’m an adult, I’m looking forward to champagne and stomping divots – is tailgating the Veuve Clicquot Polo Classic inappropriate? Who’s in?

a7

Pro’s:

  • Great city views
  • Wide, well kept trails
  • Quick and easy workout
  • Really green and lush
  • Clean bathrooms

Con’s:

  • A lot of horse shit on the trail
  • Not much shade
  • Not a ton of inclines

Tips:

  • Definitely wear sunscreen
  • Don’t expect a tough workout

Holy Shit View Factor: 8/10 Great views of LA, beautiful lush plants all the way up

How Good Your Ass Will Look Afterwards: 4/10 Not a tough climb

Post hike grub spot: As noted, with busy schedules we weren’t able to eat together after the hike. On the way back, however, there are several options in Brentwood on San Vincente to choose from.

Tracking the hike: MapMyHike has been our go-to with these hikes, and it was reliable again this weekend.

a3 a4 a5

Hike Number Five, February 1, 2015: Hastain Trail at Franklin Canyon.

Distance: 2.6 miles round trip

Elevation Change: 515 feet

Temperature day of hike: 80 degrees

Directions: From Sunset Boulevard, take Beverly Drive north (following it as it splits) to Franklin Canyon Drive. Turn right, and follow the ridge until you reach Lake Drive. Once you hit Lake Drive, find roadside parking, and walk to the trail head, which starts about 1/3 of a mile down on the left side of the road.

Sasha: Unless you’re living under a rock, you probably know this Sunday was the Super Bowl. While neither Abby nor I care about football, we had parties to attend, commercials to watch, and, let’s be honest, butts to ogle. In order to fit in our very important post-hike cocktail, we decided to stick to a shorter (and more local) hike, so we looked at Franklin Canyon. My research showed that the most challenging trail at Franklin Canyon is the Hastain trail, so we took a short but beautiful drive through the hills part of Beverly Hills to Franklin Canyon Park. After finding easy parking on the side of Lake Drive, we headed towards the marked trailhead to begin our climb.

a

We were happy to see that unlike some of our previous hikes, it looked like Hastain would be a steady incline and fairly good, albeit short, work out. While the main trail is wide and well-maintained, I read that there is a challenging single track that shoots off to the left about .4 miles from the start, so we decided to aim for that route. We spotted what looked like a marked single track route, but after I took a short scouting trip past the blank sign (seriously), I quickly realized this was not the trail I read about and we resigned ourselves to the more obvious, wide path. Soon after, we ended up passing what we later realized was the actual path, which looked more akin to a water runoff trail than a hiking trail. Note that this trail is not on MapMyHike, so you’ll have to keep your eyes peeled if you don’t want to miss it.

h2

h1

We continued upward through a chain link fence, and at about the 1 mile point, we reached an overlook with beautiful views of Century City, and the depressingly empty Lower Franklin Reservoir. There’s an option to head right and descend into the canyon at this point, but we continued up to the left to reach the top of the mountain. You’ll pass through two more chain link fences, and finally reach the highest point of the trail, with views of the incredibly green canyon and the city beyond.

h6

h3

Abby: It felt nice to take a little break at the first overlook, since it was so hot outside and the bugs decided they wanted to join us on this hike. An unwelcome addition to my weekly hike sunburn is the bug bites I acquired. The view overlooking the city was beautiful; however the lake we were eager to see at this point was waterless. The LA drought is no joke. After snapping a few photos, we decided to continue up the mountain. This second half of the trail was a little steep, but since this was our only workout for the day, we trekked quickly up the incline and were greeted with more great views. When we got to the top of the trail, we hung out a bit, and as we discussed heading back down, we noticed what looked like an alternate route. It was pretty steep and narrow, so I was a little trepid, but as we’ve mentioned before, if a hike doesn’t feel like a challenge, we will find a way to make it one.

h4

Sasha: We figured the single track trail we could see from the top was probably the steep offshoot we missed out on, so we decided for the benefit of our readers (and our asses) we would take it for the descent. This trail is narrow, steep and quite slippery, and we were grateful for a somewhat recent rain that stuck much of the loose gravel to the path. There were definitely a few sections where we needed to use our hands for safety, so we regretted forgetting our fanny packs (yes, fanny packs) for water bottle storage. When we finally reached the bottom, we realized that the path we had mistaken for a water runoff trail on our way up was indeed the beginning of this steeper trail. While this trail down was challenging due to its steepness, it was easy to follow and we made our way down fairly quickly.

h10

Pro’s:

  • Great city views
  • Wide, well kept trails
  • Multiple trail options
  • Really green and lush
  • Dogs have to be on a leash

Con’s:

  • So many bugs – could be because of the weather, though
  • Hard to find alternate routes on main trails
  • Not much shade
  • No real options for a longer, more challenging hike

Tips:

  • Pay attention on the way up, as it’s not clearly marked
  • Go during the day, as at night it would be really dark and hard to navigate

Holy Shit View Factor: 6/10 Great views of LA, beautiful lush plants all the way up

How Good Your Ass Will Look Afterwards: 6/10 Could have likely been more had we found the steeper option on the way up

Post hike grub spot: We drove down the hill to Via Alloro in the middle of Beverly Hills for a quick bite. We both had a refreshing raspberry Bellini, which was wonderful, and split a Caesar salad.

Tracking the hike: We used MapMyHike again, and as mentioned before were able to navigate our way down the right side of the mountain with the zoom in and GPS options.

h12 h11 h5

Hike Number Four, January 17, 2015: The M*A*S*H Hike

Distance: 5.24 miles

Elevation change: 433 feet

Temperature: 68 degrees

Directions: 1925 Las Virgenes Road, Malibu Creek State Park, Agoura Hills, CA 91301 – Take the 101 North and exit Las Virgenes towards Malibu Canyon. Turn left on Las Virgenes and continue until you see the well-signed entrance to Malibu Creek State Park on the right. Enter and be prepared to pay $12 for parking.

Abby: Despite the fact that neither of us have ever seen the show M*A*S*H*, we decided that we wanted to hike to the show set in Malibu Creek State Park. As always, Sasha looked into it and on Sunday, we headed to Malibu to check it out. We took the 101 instead of PCH because it was a holiday weekend and drive PCH during a holiday weekend is a terrible idea. When we got there, we passed the parking lot and ended up driving into a campground. I am still confused as to who sets up camp at Malibu Creek State Park but that’s a different conversation. Once we turned around, we found the parking lot and were on our way.

b1

Sasha: After we parked in the main lot – FYI there is a $12 parking fee so have cash handy – we decided to check out the map that was conveniently located near some restrooms that I would never use and a vending machine. We immediately noticed tons of families (read: lots of little kids) gathered around with picnic gear and we realized we were probably not going to be too challenged by today’s hike. We sped up to get in front of some larger groups and headed to the beginning of the trail, which is straight shot behind the restrooms and down a few wood steps. The path is very well marked, but if you’re nervous, you’ll immediately cross a bridge over Las Virgenes Creek, see a “no fun zone” sign and know you’re heading the right direction. If you’re using any kind of mapping app, this is marked Waycross Drive (though it is clearly for people on foot or bike, not for vehicles).

b2

The first section of the hike is extremely flat. After walking through a short section shaded by Oak trees (impressed that I knew that, aren’t you), the path becomes very open and you’ll walk alongside Las Virgenes Creek until you reach an intersection, where you will bear right to continue on Craigs Drive. After some more flat walking, you’ll notice a few porta potties and an option to go left, and finally, a moderate incline if you continue straight on Craigs Drive. We continued straight up the incline, which was long but not so hard (that’s what she said), and found Century Reservoir to the left pretty soon after the top. This section was especially well populated, as Century Reservoir turned out to be a popular swim spot for families. We decided to skip it because too many children and unhygienic adults (ew) and headed onward. The rest of the path was pretty straight forward, and you’ll know you’re almost to the site when the path suddenly narrows into a single track (and very rocky) trail through some woods. Once the trail widens again, you’ll immediately see the M*A*S*H* site ahead of you.

x3

x4

x1

According to the internet, M*A*S*H* was filmed at the Malibu Creek Park site from 1972-1983. The site is extremely well preserved and clean, with a couple of trucks you can climb into and a picnic area. Though Abby and I had no clue what the significance of any of the vehicles or other props were, we luckily had some guests along who had greater appreciation for this piece of Hollywood history. Despite our M*A*S*H* ignorance, the setting was pretty spectacular, though I’m a little confused about whether Malibu and Korea are really all that similar.

x6

 b3 b5 x2

x5

Abby: We walked a little bit further than the set site but learned quickly there wasn’t much else to see, so we headed back down. On our way down we saw someone who was walking the trail with no shoes or socks on, and I don’t think we’d recommend doing that because there are a lot of rocks, and lets be real, it’s not smart to walk anywhere outside without shoes on. It was busy again when we got closer to the entrance but it was easy to make our way down. When we got to the end of the hike, we all agreed it was more of a nature walk. We also ran to the car as we were starving.

Pro’s: 
  • Beautiful scenery
  • Nicely shaded
  • Signage made it easy not to get lost
Con’s:
  • Not many inclines, so it was more of a trail walk than hike
  • Lots of people at the entrance/exit
Tips: 
  • It would be fun to have a picnic on the MASH site, so bring food if you are into that
Holy Shit View Factor: 6/10
  • The foliage was really beautiful
  • There were several times where we noted that it was great scenery because of the trees and mountains
How good your ass will look after: 4/10 There was a small climb that was pretty steep about half way through
Post hike grub spot: We went to Mediterranean Pit Grill because who doesn’t want Mediterranean food after exercising? It was excellent food. We had a friend with who is on a strict diet and still found something she could have.

1mash 2mash 3mash 4mash